A phone, a window, a plain blanket and a sleepy baby. That is the entire kit for DIY newborn photography, and it gets you 90% of the way to the photos you're picturing. An AI finishing step closes the last 10%, the part that usually separates home snapshots from studio portraits.
This guide covers the whole DIY route: the gear (spoiler: it's in your house), the light, the posing basics that keep your baby safe, the mistakes almost every parent makes on the first try, and how Totti turns your best frame into a portrait that looks professionally shot.
What do you need for DIY newborn photography?
- Your phone. Any recent iPhone is more camera than you need. Clean the lens first; pocket lint softens more baby photos than any other single cause.
- A plain blanket. Cream, white or soft pastel, stretched tight over a bed or couch cushion. Ironed if possible.
- A big window. Your main light. North-facing or shaded windows give the softest, most even glow.
- A white sheet or foam board. Optional: placed opposite the window, it bounces light back and softens shadows on the far side of the face.
- A second adult. Not optional when your baby is on any raised surface. The spotter stays within arm's reach, always.
Light makes or breaks DIY newborn photos
Professional newborn photos look professional mostly because of light. Copy these rules and your snapshots jump a full tier:
- Use soft, indirect window light. Lay the blanket beside the window so light falls across your baby at about 45 degrees.
- Never use flash or overhead lights. Flash startles and flattens; ceiling lights cast yellow tones and hard under-eye shadows. Turn them off and let the window do the work.
- Avoid direct sunbeams. If sunlight is streaming in, hang a white sheet over the window or wait for a cloudier hour.
- Shoot during the day. Daylight keeps newborn skin tones true; lamplight turns them orange.
If you want to go deeper, our newborn photography lighting guide covers window direction, timing and troubleshooting.
Which poses are safe for a DIY newborn shoot?
Rule zero. You are a parent with a phone, not a trained newborn poser, and that is fine, because the safest poses are also the most natural ones.
- Back-lying is the home-run DIY pose. Baby on their back on the blanket, you shooting from directly above. It matches the back-sleeping position pediatricians recommend, and it's also the ideal source photo for AI restyling.
- Side-curl works when your baby does it naturally. Never force limbs into position; guide gently and accept what your baby offers.
- Keep a spotter within arm's reach any time your baby is on a bed, beanbag or props.
- Skip the forced poses entirely. The chin-on-hands "froggy" pose you see online is a composite made by professionals, with a trained assistant supporting the head at all times and two frames merged in editing. It is not a DIY pose.
- Keep the room warm. A room at 75–80°F keeps a sleepy newborn settled and curly.
For the full checklist, read our newborn photography safety rundown before your first session.
What are the most common DIY newborn photo mistakes?
All five show up in first-try home sessions. The first four cost you nothing but a reshoot, and the fifth is the only one that matters for safety.
- Shooting at the wrong time. An overtired, hungry baby ends every session early. Feed first, shoot during the longest nap. Days 5–14 are ideal for those curled, sleepy shots.
- Busy backgrounds. Laundry, cords and patterned sheets pull the eye from the face. One plain blanket fixes it.
- Overhead light on, flash on. See above. Window only.
- Too few frames. Sleeping newborns drift between micro-expressions constantly. Take dozens; expect one or two keepers.
- Trying to copy professional poses. Attempting composite-only poses is the one DIY mistake that's actually dangerous, not just cosmetic.
How long should a DIY newborn session be?
Twenty minutes, and you can stop sooner. Aim for one frame you would be happy to print, then let everyone go back to napping.
A DIY session that produces one sharp, well-lit, back-lying photo is a complete success, because that single frame is raw material for an unlimited number of studio-style portraits.
A realistic 20-minute session plan
- Minutes 0–5: Feed, burp, swaddle. Warm the room while you set the blanket by the window.
- Minutes 5–10: Back-lying shots from directly above. Get the sharp, well-lit keeper first — everything after is bonus.
- Minutes 10–15: Detail shots of eyelashes, curled fingers and tiny feet, plus a natural side-curl if your baby offers one.
- Minutes 15–20: One shot with a parent's hands in frame for scale, then stop while everyone's still happy. Short sessions keep the whole routine repeatable for monthly milestones.
How AI upgrades your DIY snapshots to studio level
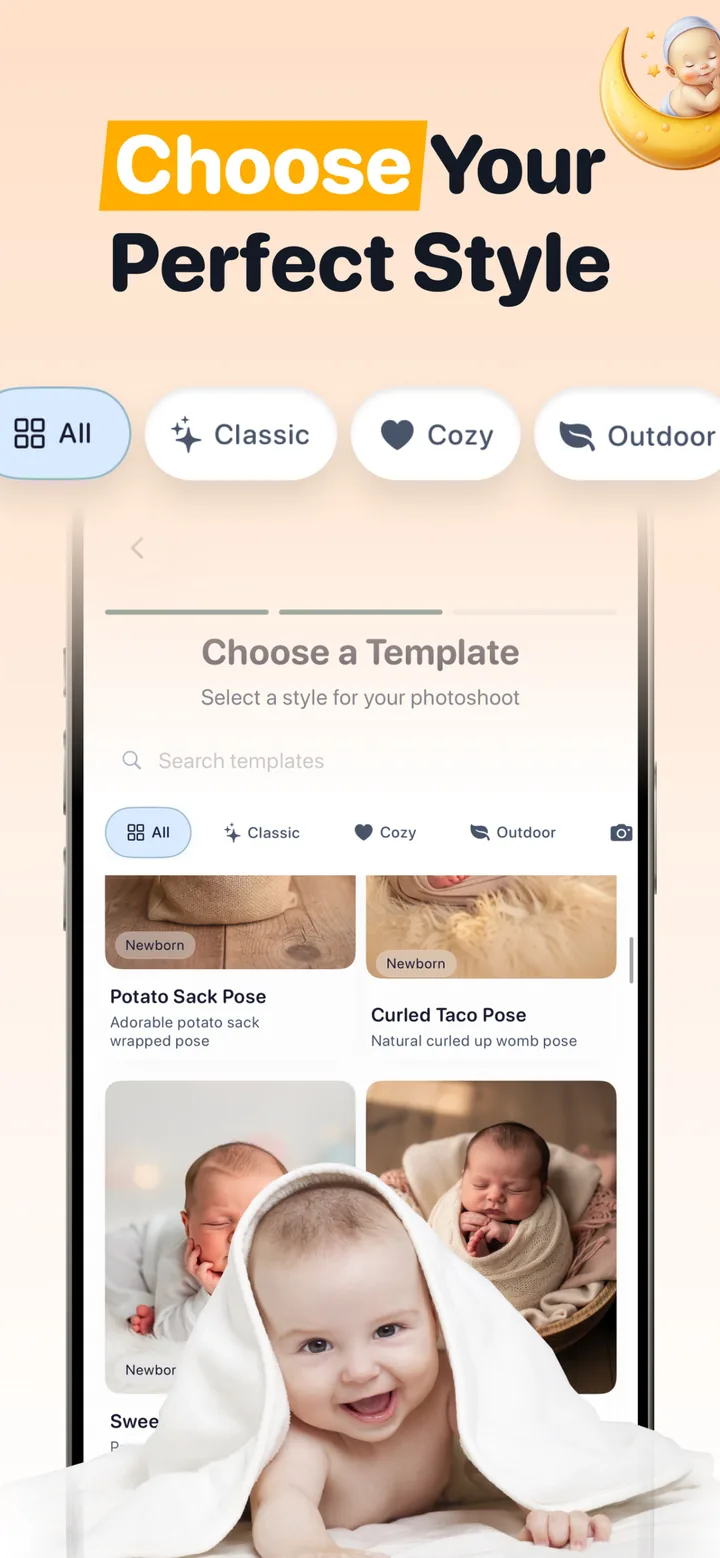
The honest gap in DIY newborn photography is styling. Light and safety are yours to control. A professional backdrop, wardrobe and set styling are not, and no amount of care with a spare bedsheet gets you there. That's the part AI now does. Totti takes your best home snapshot and regenerates the scene (background, lighting, outfit, props) while preserving your baby's real facial features. Your simple back-lying photo becomes a Potato Sack pose, a Curled Taco pose or a Sweet Slumber portrait without your baby ever being posed, dressed up or even woken.
Finish your DIY shoot with Totti
Upload the best frame from today's nap, choose from 50+ templates across Classic, Cozy, Outdoor and seasonal styles, and export a studio-quality portrait in HD 2048×2560. Free to download on iPhone.
Get Totti on the App StoreDIY alone vs. DIY + AI: what actually changes
| DIY only | DIY + Totti AI | |
|---|---|---|
| Backdrop & props | Whatever's in your house | 50+ styled scenes |
| Outfits | What fits today (and stays clean) | Virtual knits, rompers, holiday wear |
| Poses | Back-lying, natural curls | Classic newborn poses, generated safely |
| Editing | Your filter skills | Studio lighting and styling, automatic |
| Cost | Free | Free to start |
The two approaches are a pipeline, not competitors. Shoot simple and safe at home, then restyle. If you want a fuller walkthrough of the shooting half, our newborn photoshoot at home guide covers the 15-minute setup, and the newborn photo poses guide explains every classic pose and which are safe to try yourself.